How to configure BSNL indoor wimax CPE in 4 easy steps.
Hello guys, have you recently purchased your BSNL wimax device and wondering how to configure it. Don’t worry, you are in right place and I will show you step by step procedure to configure your wimax. Configuring wimax is super easy. All you need is your Wimax user id provided by BSNL and for rest of the part, I will guide you literally holding your hand. All right, without wasting any time let’s head on.
Step #1 : Feed the device.
First of all connect the wimax with electric outlet. Now on watching back panel of wimax you may find two ports on it. One is LAN and other is Telephone. You need to connect the one end of Ethernet cable provided along with the wimax to its LAN port and the other end to your PC/Laptop.
Step #2: Check your IP credentials.
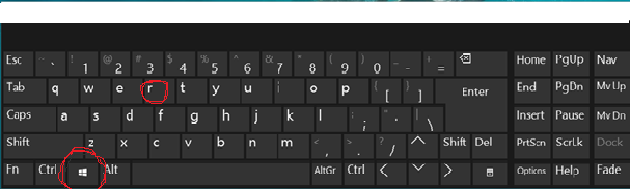
Now before we head to configuring your device we need to make sure that there is no Static IP assigned on your PC/Laptop. To do this Go to Control panel of your computer. If you find difficulty finding control panel on your PC/Laptop just press the windows button showed below in red circle and R together( Win +R).
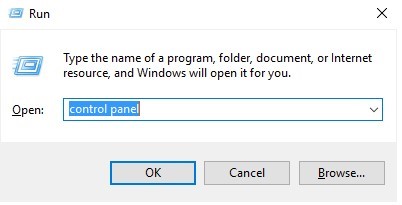
Now run screen will appear. Type control panel on the little box as shown on the image below and hit Enter.
Go to Network and internet → Network and sharing center → change adapter settings (on top right corner).
Now a screen appears showing your network connections.
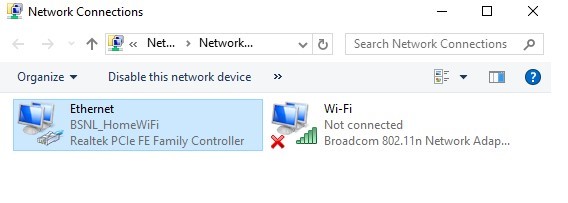
Right click on “Ethernet” or “Local Area Connection” whatever it appears. On my Laptop it is showing as Ethernet and someone elses PC it might show like Local Area Connection. After right clicking on it select Properties. Now select Internet protocol version 4 (TCP/IP V4) and then again click on properties.
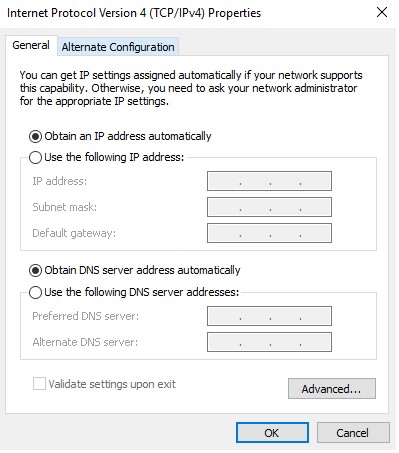
All you need to do here is to check the little button showing Obtain IP address automatically and Obtain DNS Server address automatically.
Step #3: Find the IP address of your Wimax
OK! Now we will find out the IP address of Your wimax device. Finding IP address of any device is super easy. All you need to do is follow along with me.
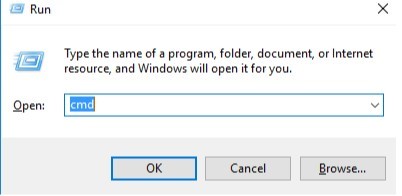
Again we will be using here run. Remember how did we find out the run window in step 2. Type windows button on your keyboard and ‘R’ at the same time. Then type cmd on the box and hit Enter on your keyboard. I will make it easy for you. Just look at the image below.
Now a window with black background will appear on your screen. Type ‘ipconfig’ on it and press Enter as shown on the image below.
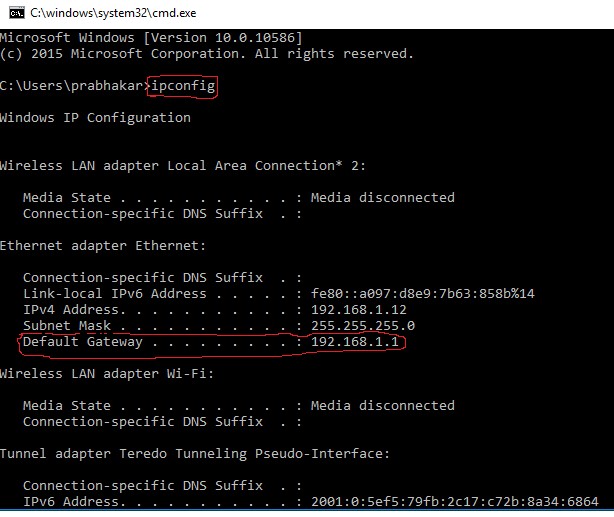
Now look for default gateway on the screen and you will find a IP address. In my case it is 192.168.1.1. This is the IP address of wimax. This IP address is very important. If you have a pen and paper then grab it and note it down. In most of the cases BSNL wimax comes with IP 192.168.1.1. But I have also found some devices with IP address other than 192.168.1.1 e.g 192.168.15.1. Anyway it is always a good practice to check your wimax IP address in command prompt rather than scratching your hand to find its address.
Now, as you have the IP address, we will move forward to our next and final step.
STEP # 4: Putting User id inside the wimax
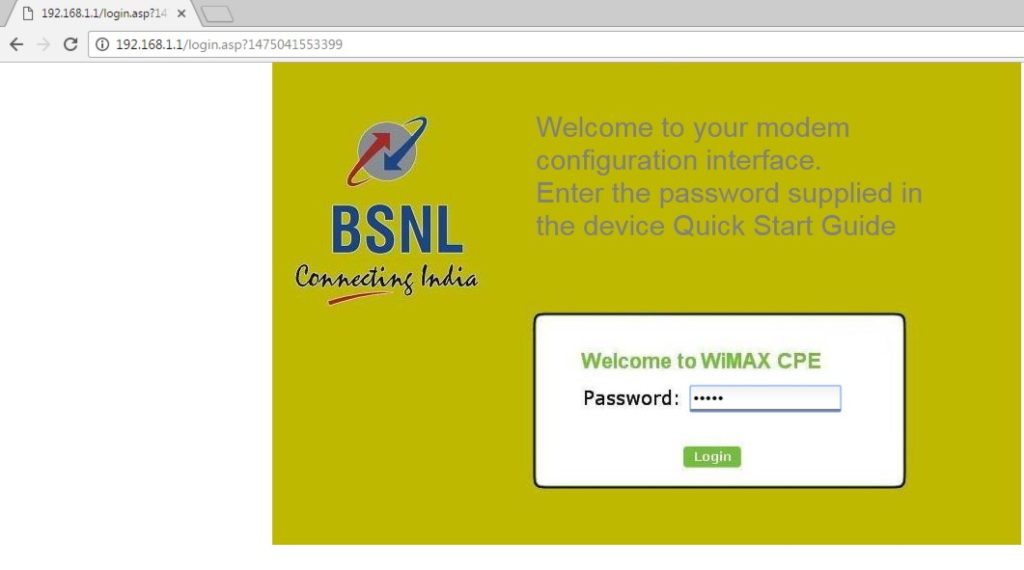
Now, open any browser of your PC/Laptop and type the IP address of wimax on its address bar and press enter.
A screen will appear asking for a password. Put ‘admin’ on the password field and click login.
Now you will land on status page of wimax showing various parameters. I will give you a quick hint on two such important parameters.
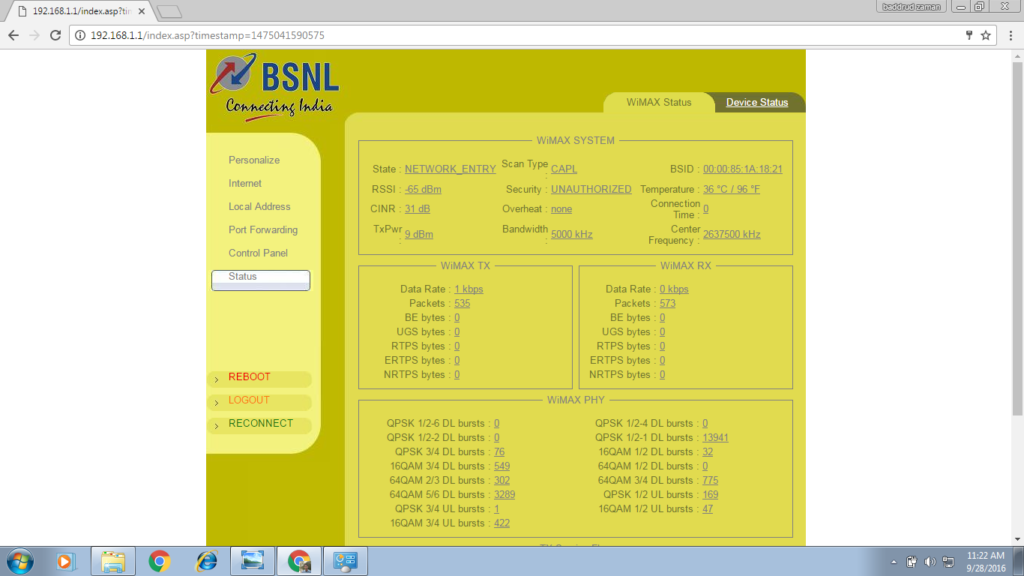
Network Entry: If your wimax state is Network Entry it means that you are not authenticated on your network yet. In our case as we have not put any user id on it so it is pretty obvious that it will show Network Entry.
RSSI( Received Signal Strength Indicator): Your wimax’s RSSI level shows how strong your wimax’s signal is. Anything in between -50 dbm to –85 dbm is considered as good signal strength. Make sure your device has RSSI within the mentione bounadary level. If it is not then I will post a Soloution to this on my next post.
Alright now hovering over Menu you will find a tab named ‘Internet’. Click on it.
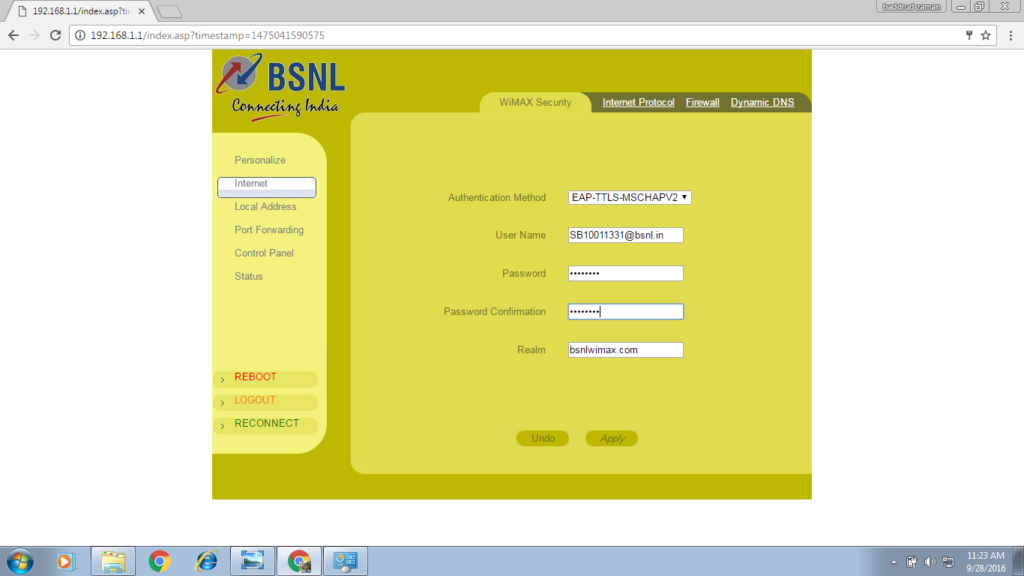
Put the user id provided to you by BSNL on the user name field. Put the password as ‘password’ and also fill the password confirmation field with the same password. Leave the other parameters as it is and hit Apply. That’s it guys. Your wimax is now configured and you are ready to browse internet. Please also observe the image below.
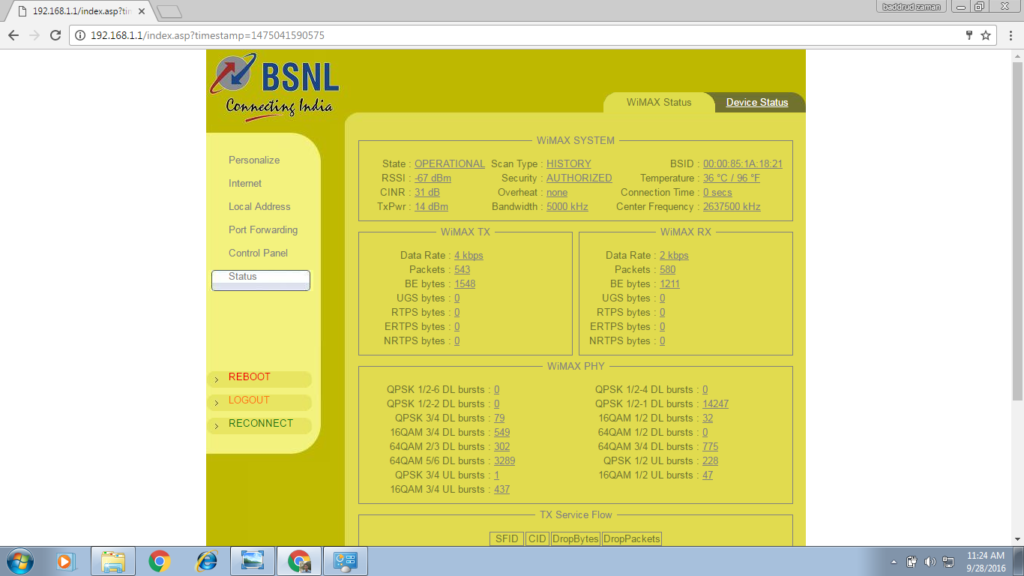
You can see that wimax state is showing OPERATIONAL now. It means that you are now connected to internet.
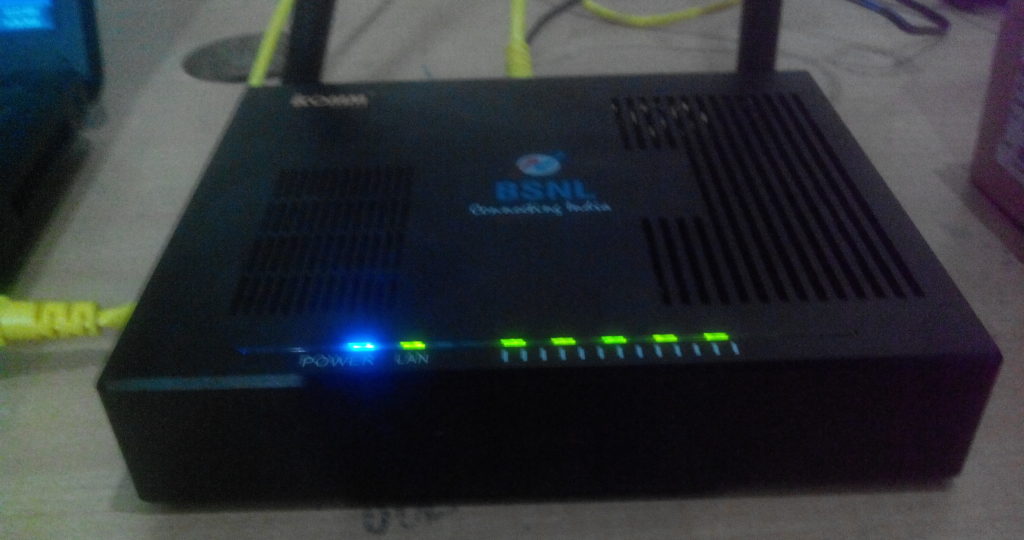
Also observing the front panel of wimax you can see that all the LED are glowing stable now. It means you are connected to the internet.
Liked this post? Please share it and support us by liking our page on Facebook and following us on Twitter and Google+. Keep visiting Bpedia. See you soon.


Sir I m unable to access some sites and application through my wimax connection like play store olx and uploads in fb wat will be the possible reason ??
Hi bibin, what’s the error you get? Have you tried accessing these sites from some other phones or PC? Just to be sure that the problem is not within your phone.