Don’t have a wireless router? Make your Laptop/PC a wireless hotspot.
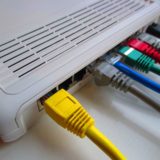
Hello friends, welcome to Bpedia. Do you use ADSL modem for the internet which does not have wi-fi facility or a USB dongle to connect to the internet and are you looking for a way to use wi-fi somehow even though your modem does not support wi-fi. There are some software available on the web like connectify, virtual router etc but there was always a catch. Some come with trial period and some disconnects after every 5 to 6 odd minutes and that is really irritating. But there is one best way to use wi-fi on your smartphone and tablets even if you don’t have wireless facility available on your modem/USB dongle by making your PC/Laptop a wi-fi Hotspot and the best part is you don’t have to pay to use this feature. Today I am going to show you how.
Requirement?
You should have a Wireless network adapter installed on your Laptop/PC:
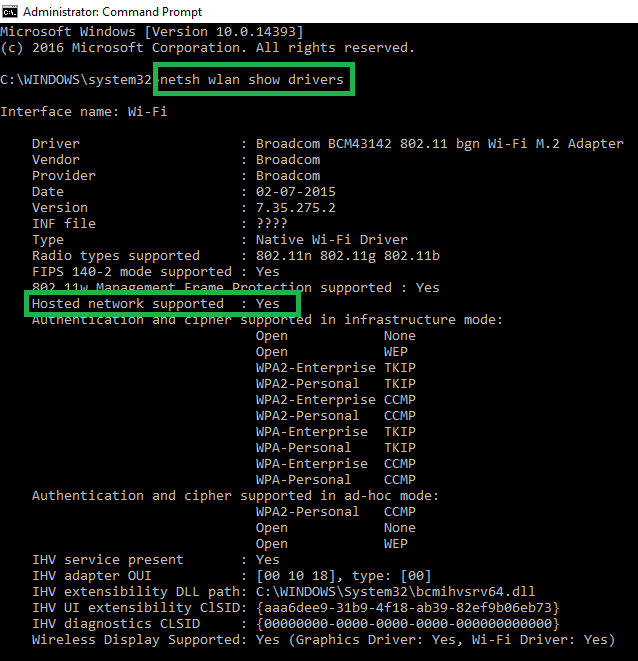
To make your Laptop/PC a wi-fi hotspot your device should have a wireless network adapter installed on it. If you are not sure whether you have a wireless network adapter installed or not then type this command on command prompt(Run as administrator).
netsh wlan show drivers
If hosted network supported is Yes then you can use your PC/Laptop as a wi-fi hotspot.
Now we need to write a couple of commands to get the work done.
Set up hosted network:
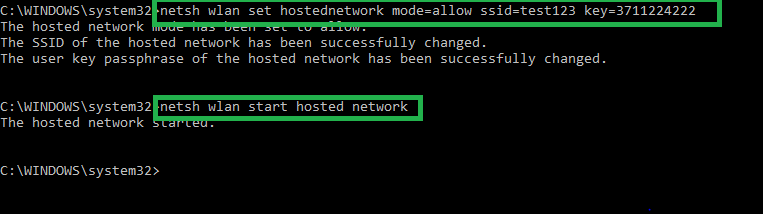
Again open the command prompt and run as administrator by right clicking on it.
1st command: netsh wlan set hosted network mode=allow ssid=test123 key=3711224222
After typing the command press Enter on the keyboard. Here SSID(service set identifier) is your wi-fi access point name. You can put any name by your choice. Similarly Key will be your wi-fi password and you can set it according to your wish.
2nd command:
netsh wlan start hosted network
This is simple. This command will start the network that you have created on 1st step.
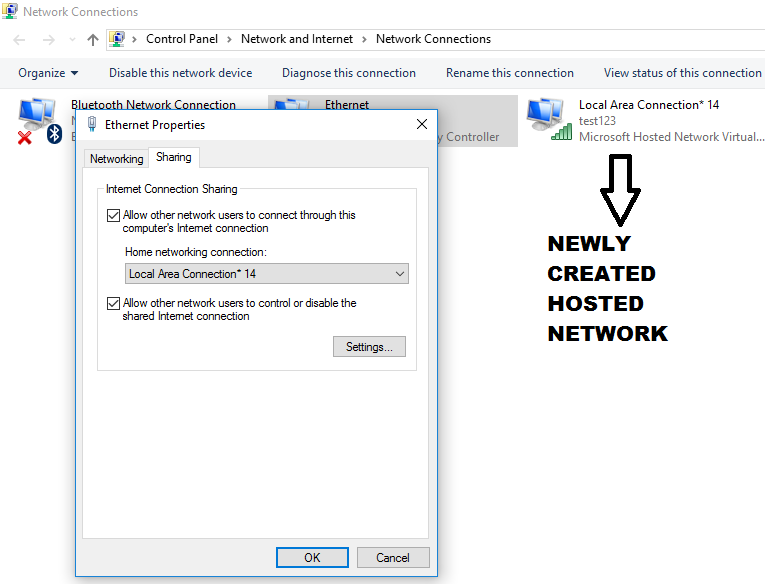
Once you have created the network you will be able to see the newly created hosted network on Network connections. Now go to
For windows XP: control panel→network and internet connection( or network connection)→local area connection
For windows vista: control panel→network and internet→network and sharing center→Manage Network connection(on left side)
For windows 7/8/10: control panel→network and internet→network and sharing center→change adapter settings( located on top left corner)

Now Right click on Local Area Connection/Ethernet→Properties→sharing→click on Allow Other network Users to connect through this computer’s internet connection→Select newly created hosted network name under the dropdown→OK
This is it. Now try accessing your smartphone or other wireless devices. You will be able to use the wi-fi. But please do remember that every time you turn off your PC/Laptop, you have to start the hosted network again by typing the 2nd command only on the command prompt. No need to type the 1st command. But guess what, I will give you a solution to this problem too.
Open notepad and type the 2nd command, that is netsh wlan start hosted network and save the file on the desktop. Now rename it as a .bat for example hosted network.bat. When you turn on your PC/Laptop, double-click on it to start the hosted network.
If you have liked the post then please do share. This will really help us. And if you want us to send more interesting topics to your inbox then please subscribe the blog. Thank You.


How to use USB dongle?
The procedure for using USB dongle is also same.